Why knife skills matter beyond looking good
Knife skills are the first thing an experienced chef watches when a new cook steps onto the line. It is not about showing off speed. Uniform pieces cook at the same rate, so a sauté of evenly diced vegetables finishes together instead of mixing raw and mushy pieces. Consistent cuts make portions predictable, plates look the same from cover one to cover two hundred, and recipe costing actually holds up in practice.
Good technique is also the best safety program a kitchen has. Most cuts happen with dull knives, poor grips, cluttered boards and rushed cooks. A sharp knife in a trained hand needs less force, so it is less likely to slip. That is why professional kitchens treat knife work as a core skill, train it deliberately and keep checking it long after a cook has passed their first week.
This guide covers the tools, how to keep them sharp, the grips that make cutting safe and fast, the classic cuts with their standard dimensions and a training plan you can use with your own team. It is written for chefs who train others as much as for cooks who want to sharpen their own technique, and the same principles apply whether your menu is French, Indian, Japanese or a mix of all three.
Building a practical knife kit
A cook needs fewer knives than most catalogs suggest. A chef’s knife of 20 to 25 centimeters handles the majority of work. Add a paring knife for detailed work, a serrated knife for bread and tomatoes, a flexible boning knife for butchery and a long slicer for carving. Japanese-style gyuto and santoku knives are popular for their thin, hard blades. Many Indian kitchens also rely on a heavy cleaver for meat on the bone and for crushing ginger and garlic.
Steel choice is a trade-off. Softer Western steels, typically around 56 to 58 on the Rockwell hardness scale, are tough and easy to hone but lose their edge faster. Harder Japanese steels of 60 or more take a finer edge and keep it longer but chip more easily on bones or frozen food. Western knives are usually sharpened to about 20 degrees per side, Japanese knives closer to 15. Choose for the work, not the label.
| Knife | Typical length | Main uses |
|---|---|---|
| Chef’s knife or gyuto | 20 to 25 cm | Chopping, dicing, slicing, most daily prep |
| Paring knife | 8 to 10 cm | Peeling, trimming, tourné, detailed work |
| Boning knife | 13 to 15 cm | Separating meat from bone, trimming silver skin |
| Serrated knife | 20 to 25 cm | Bread, tomatoes, delicate cakes |
| Cleaver | 15 to 20 cm | Bone-in meat, crushing aromatics, Chinese and Indian prep |
| Slicer | 25 to 30 cm | Carving roasts, slicing cured fish and terrines |
Grips, the guiding hand and the board
The pinch grip is the standard for control. Hold the handle with your last three fingers and pinch the blade itself just in front of the bolster between your thumb and the side of your index finger. This puts your hand close to the balance point and gives precise control over the tip. Pointing the index finger along the spine feels secure to beginners but reduces control on hard vegetables and tires the wrist.
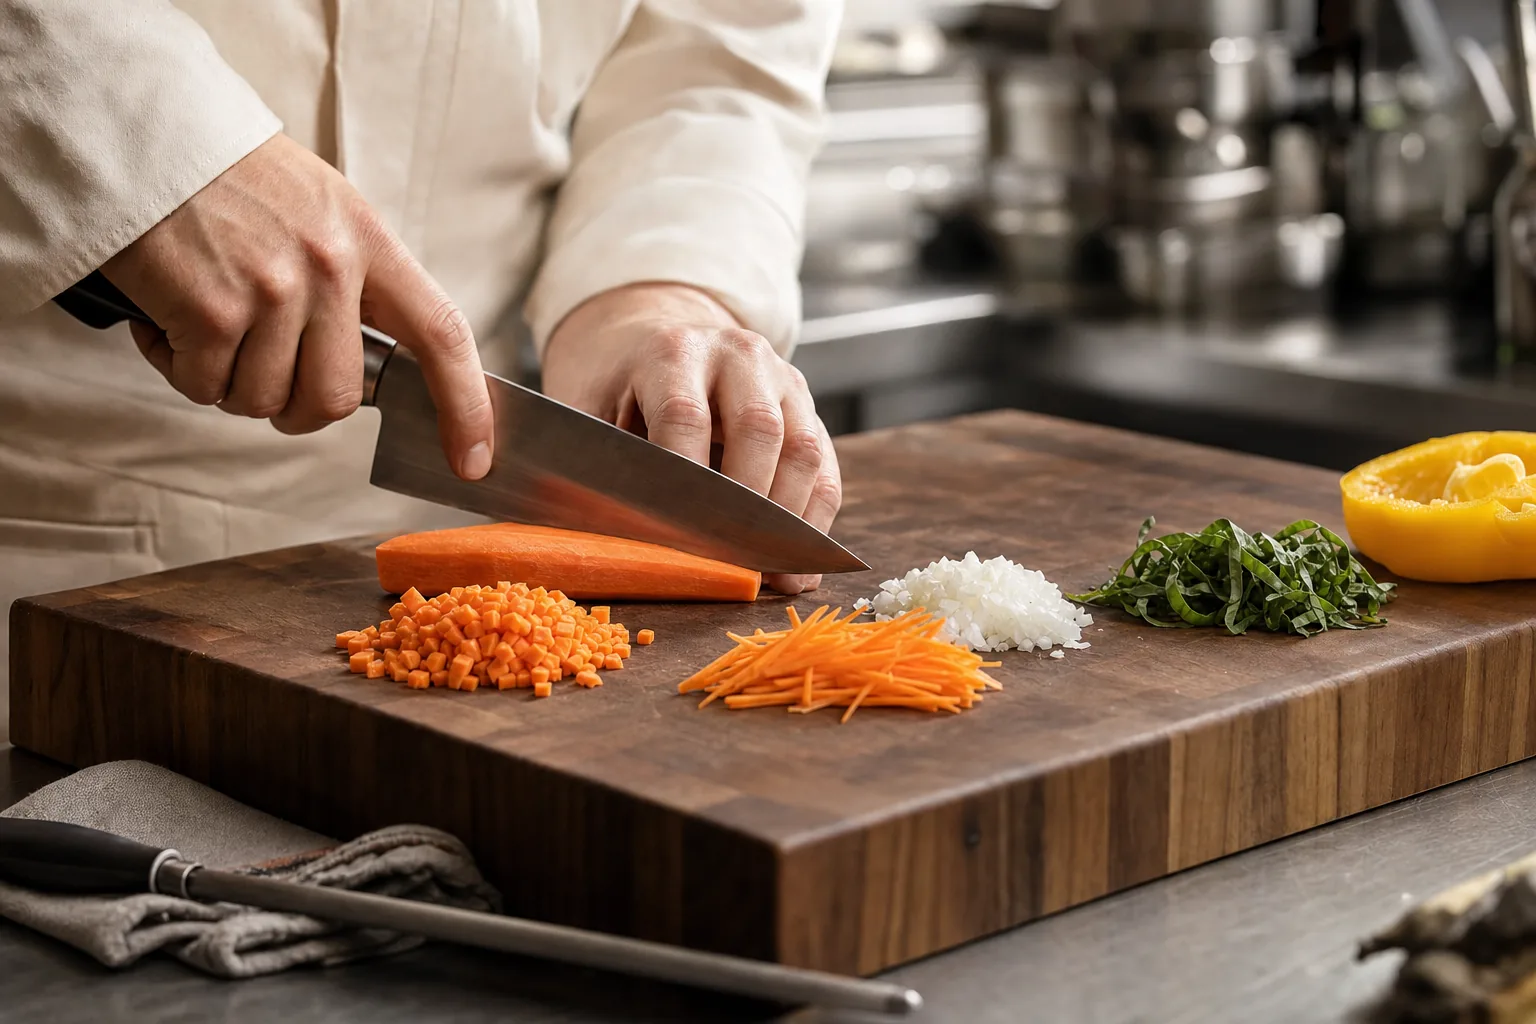
The guiding hand matters just as much. In the claw grip, fingertips are curled under and the knuckles rest against the flat of the blade, which acts as a guide. The thumb stays tucked behind the fingers. The knife should never rise above the knuckles. Move the claw back steadily as you cut, rather than moving the knife toward your fingers.
Set up the board before you start. Place a damp cloth or non-slip mat underneath so it cannot move, keep a bowl or hotel pan for trim and another for finished product, and clear everything else off the station. Choose the cutting motion to suit the food: a rocking motion for herbs, a forward push cut for most vegetables and a long, single pull for raw fish and roasts.
The classic cuts and their dimensions
Classic cuts give the whole kitchen a shared language. When a recipe says brunoise, everyone should produce the same size without asking. Most cuts begin by squaring off the vegetable into a neat block, then cutting planks, then sticks, then cubes. The trim from squaring off is not waste: it goes into stocks, soups, purées and staff meals. For round vegetables such as onions, use the natural layers instead: halve through the root, make horizontal and vertical cuts toward the root without cutting through it, then slice across.
Dimensions vary slightly between schools, and some kitchens use allumette and julienne interchangeably. The standard below is widely taught. Pick a reference, write it into your recipes and keep a printed card or a set of sample cuts at the prep station for new staff. A small ruler kept at each station sounds fussy, but it settles arguments quickly and helps trainees calibrate their eye in the first few weeks, after which most cooks no longer need it.
Chiffonade and fine herb work
Chiffonade is used for leafy herbs and greens such as basil, mint and spinach. Stack the leaves, roll them tightly into a cigar and slice across the roll to produce fine ribbons. Use a very sharp knife and a single forward stroke for each cut; a dull blade bruises and blackens the edges. Cut chiffonade as close to service as practical, because delicate herbs darken quickly once sliced.
Tourné and decorative cuts
The tourné is a seven-sided barrel shape about 5 centimeters long, cut with a paring or bird’s beak knife. It is slow and produces a lot of trim, so it appears mostly in fine dining and in training. It is still worth teaching because it builds control of the knife tip and the guiding hand, skills that carry over to faster everyday work.
Cuts in Indian and Asian kitchens
Indian kitchens depend on precise onion work: thin, even slices for birista, the crisp fried onions used in biryani, so they brown together without burning, and a very fine chop for masala bases that need to melt into the gravy. Ginger is often cut into fine julienne for garnish and pounded for pastes. Chinese kitchens use thin, uniform slices and bias cuts so vegetables cook in seconds in a wok. The principle is the same everywhere: uniformity controls cooking.
| Cut | Dimensions | Typical uses |
|---|---|---|
| Brunoise | 3 × 3 × 3 mm | Garnishes, sauces, fine salsas, consommé |
| Small dice | 6 × 6 × 6 mm | Mirepoix for sauces, salads, soups |
| Medium dice | 12 × 12 × 12 mm | Stews, braises, roasted vegetables |
| Julienne | 3 × 3 × 50 to 60 mm | Stir-fries, garnishes, slaws |
| Batonnet | 6 × 6 × 50 to 60 mm | Crudités, glazed vegetables, base for small dice |
| Paysanne | 12 × 12 × 3 mm | Rustic soups and quick-cooking vegetables |
Knife safety rules every kitchen should enforce
Safety rules only work if they are simple, repeated and enforced every shift. Write them into onboarding and repeat them in pre-service briefings, especially with new or temporary staff. Most of the rules below take no extra time; they are habits that become automatic within a few weeks if senior cooks model them consistently. When a head chef carries a knife carelessly or leaves one buried under a towel, the whole brigade learns that the rules are optional.
Keep a properly stocked first aid kit with blue detectable plasters near the line, and make sure everyone knows how to report an injury. Any food or equipment touched by blood must be discarded or cleaned and sanitized according to your local food safety rules. Review every cut that needed first aid: was the knife dull, the board unstable, the station crowded or the cook rushed? The answer usually points to a fix in setup or training rather than a need to tell the cook to be more careful.
- Never try to catch a falling knife. Step back and let it drop.
- Carry a knife with the point down and the blade close to your side, and say “knife” or “sharp” when passing behind someone.
- Never leave a knife in a sink of soapy water; wash it, dry it and put it away immediately.
- Use a cut-resistant glove on the guiding hand with mandolines and when shucking oysters.
- Keep knives sharp: a dull blade needs more force and is more likely to slip.
- Store knives on a magnetic strip, in a block or in sheaths, never loose in a drawer.
- Stabilize round foods by cutting a flat side first so they cannot roll.
Training knife skills in your team
Telling a new cook to dice an onion finely is not training. Show the cut, explain the target dimension, let them practice with supervision and then check the result against a reference. Train one cut at a time and build up. Most cooks plateau not because they lack talent but because no one ever corrected their grip in the first month.
Use everyday prep as training. Allocate onions, carrots and celery for mirepoix to a trainee with a time target and a quality check, and use the result in stocks so nothing is wasted. Pair trainees with a senior cook for the first few shifts, then progress to timed drills. Recognize improvement publicly; knife skills are a point of pride in good kitchens.
- Week one: grips, board setup, safety rules and squaring off vegetables, with no time pressure.
- Week two: small dice, medium dice and slicing onions, checked against sample cuts.
- Week three: julienne, brunoise and chiffonade, plus honing before each shift.
- Week four: timed drills, such as dicing a set weight of onion, with a target time agreed for your kitchen.
- Monthly: sharpening on stones under supervision and a yield check on a protein or vegetable.
- Ongoing: spot checks during prep and quick feedback, recorded in a simple training log.
Speed, yield and the cost of a cut
Speed comes from rhythm, not rushing. A cook who sets up a clean board, keeps product moving in one direction and uses consistent motions will outpace someone who hacks quickly but has to sort through uneven pieces. Organize mise en place so the most-used cuts are prepared first, and batch similar cuts together to stay in rhythm. Peel every onion before slicing any, then slice them all, then dice them all. Fewer changes of task mean fewer wasted movements, and a cook who works this way often finishes a prep list well before one who moves from item to item.
Yield is where knife skills meet the profit and loss statement. Trimming a beef tenderloin, breaking down a chicken or peeling a case of mangoes can produce very different usable weights depending on the cook. Run yield tests: weigh the product before and after trimming, record the usable percentage and set a target. Compare cooks and coach anyone whose yield is consistently below the kitchen standard.
Plan for the trim. Vegetable offcuts can go into stock, carrot peelings into a staff-meal soup, chicken bones into a brown stock, and herb stems into oils or chutneys. A kitchen that cuts well and uses its trim needs to buy less. Keep labeled containers for usable trim at each station and give someone responsibility for turning it into something useful before it spoils.
Speed comes from rhythm, not rushing.
Frequently asked questions
What is the difference between honing and sharpening a knife?
Honing realigns an edge that has rolled over during use, using a steel or ceramic rod, and removes little or no metal. Sharpening grinds away metal on a whetstone or sharpener to create a new edge. Cooks should hone often, even every shift, and sharpen only when honing no longer restores a clean cut.
How big is a brunoise cut?
A standard brunoise is a 3 millimeter cube. It is made by first cutting the vegetable into julienne, 3 by 3 millimeter sticks, then cutting those sticks crosswise into cubes. Some kitchens also use a fine brunoise of around 1.5 millimeters for garnishes and consommé. Write your standard into recipes so the team cuts consistently.
What knife should a beginner chef buy first?
Start with a good chef’s knife of 20 to 25 centimeters that feels balanced in your hand, a paring knife and a serrated knife. Add a honing rod and, when you are ready to learn, a combination whetstone. Choose comfort and steel you can maintain over brand names, and learn to keep that knife sharp before buying more.
How do you hold a knife properly?
Use the pinch grip: hold the handle with your last three fingers and pinch the blade just in front of the bolster between your thumb and index finger. Your other hand forms a claw with fingertips tucked under and knuckles against the side of the blade, guiding the cut while keeping fingertips out of the way.
How often should restaurant knives be sharpened?
It depends on use and steel. A heavily used chef’s knife in a busy kitchen might need the stones every week or two, while a slicer used occasionally may only need it a few times a year. Hone daily and sharpen when honing no longer brings back a clean cut through paper or tomato skin.
- #knifeskills
- #classiccuts
- #knifesharpening
- #kitchensafety
- #kitchentraining