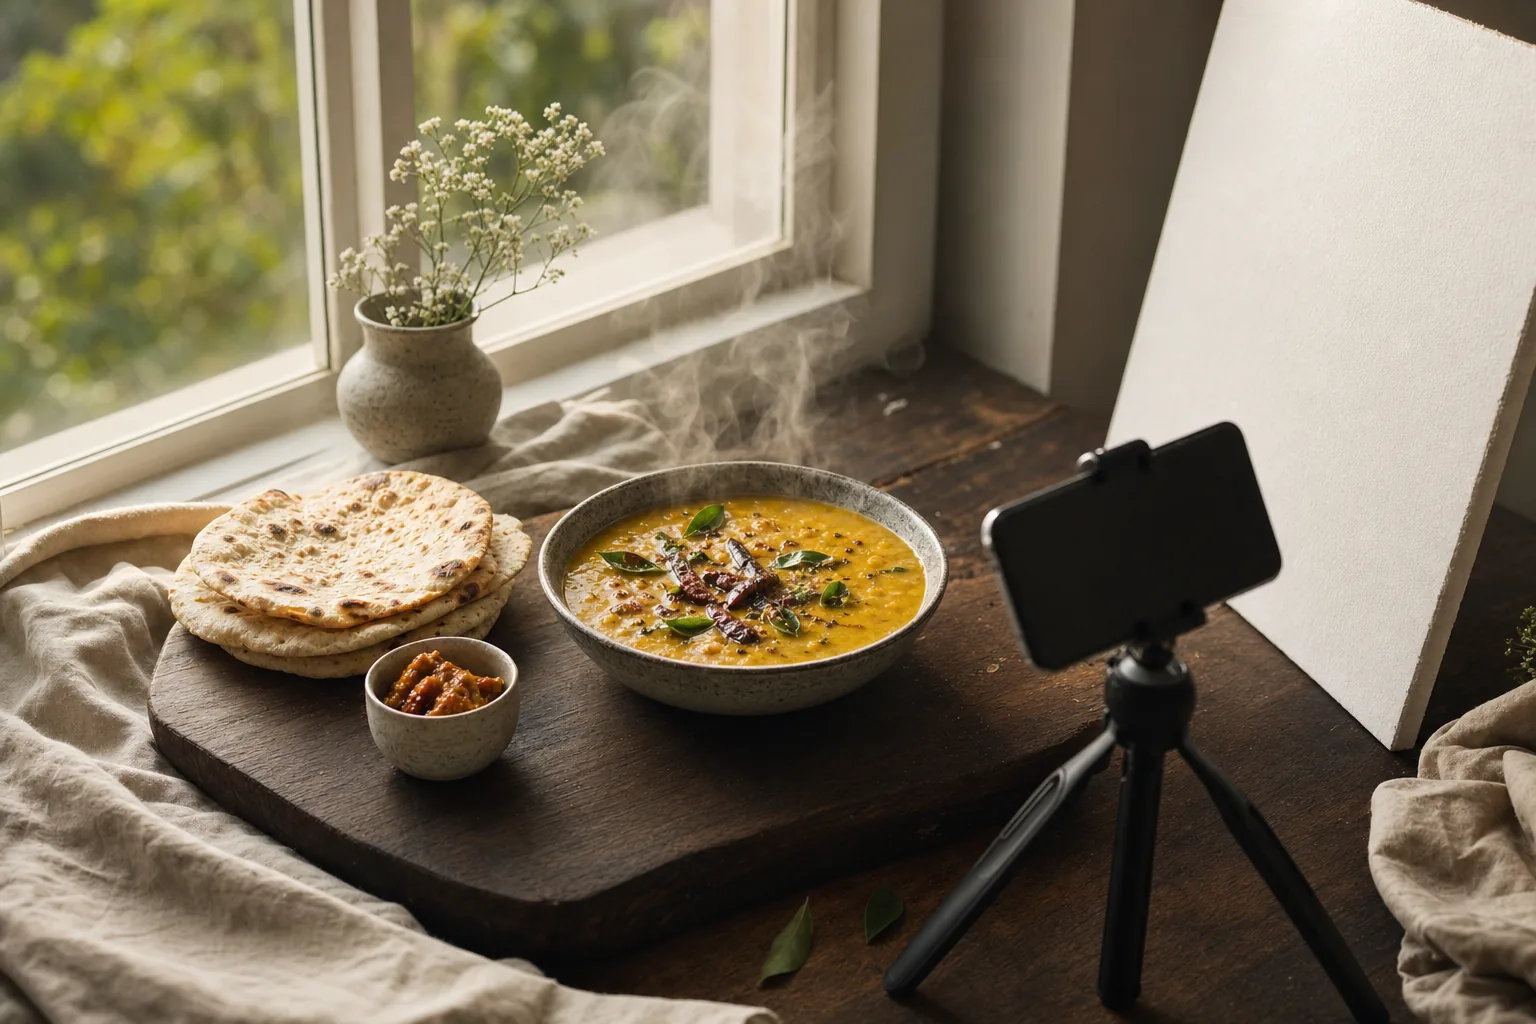
What a menu photo is for
A menu photo has one job: to show a guest what will arrive at the table, clearly and appealingly enough that they feel confident ordering it. That is different from a social media post or a cookbook spread. Menu photos are viewed small, often on a phone at the table, side by side with other dishes. They need to read instantly, look consistent with each other and match the real plate.
Not every dish needs a photo. Photographs are most useful for dishes guests do not recognize by name, regional specialties, signature plates you want to sell, and dishes whose size or presentation is a selling point, such as a sharing platter or a thali. A menu where every line has a photo can feel crowded; a menu with well-chosen photos guides the eye.
Start with a shot list. Write down each dish, the plate it is served on, the angle you will use and any notes about garnish or accompaniments. A shot list keeps a photo session efficient, so the kitchen is not firing dishes at random while the light changes. Schedule the session before service, with each dish timed so it arrives fresh, and photograph sauces and fried items first because they change fastest on the plate.
Use natural light, and control it
The best light for food is soft daylight from a single direction, usually a large window that is not in direct sun. North-facing windows in the northern hemisphere, or any window on an overcast day, give even, flattering light. Set a small table close to the window and turn off overhead lights, because mixing warm bulbs with cool daylight produces muddy colors that are hard to correct.
Position the light to the side of or slightly behind the dish. Side light shows texture: the crust on bread, the crisp edges of a dosa, the glossy surface of a curry. Backlight makes sauces, soups and drinks glow and catches steam. Front light, with the window behind you, tends to flatten food and is the most common reason home-style photos look dull.
Shape the light with simple tools. A sheet of baking paper or a white shower curtain taped over the window diffuses harsh sun. A piece of white card or foam board on the opposite side bounces light back into the shadows, and a black card deepens them for a moodier look. These cost very little and do more for your photos than a new phone.
Choose the angle by dish type
The right angle is the one that shows what makes the dish appealing. Flat dishes with interesting surfaces look best from directly above. Tall or layered dishes need to be seen from the side so the height and layers are visible. Bowls with depth sit somewhere in between, where you can see both the rim and what is inside. Drinks follow their own rule.
Once you choose an angle for a type of dish, use it consistently. If every curry is shot at 45 degrees and every flatbread from overhead, the menu looks planned and guests can compare dishes easily. Mixing angles randomly within a category is one of the quickest ways to make a menu look amateur. Write the chosen angles into your shot list so reshoots match.
| Dish type | Best angle | Why it works |
|---|---|---|
| Pizza, thalis, flatbreads, sharing boards | Overhead, directly above | Shows the full layout, toppings and variety at once |
| Burgers, layer cakes, stacked desserts, sandwiches | Eye level, 0 to 15 degrees | Reveals height, layers and fillings |
| Curries, dals, ramen, soups, rice bowls | About 45 degrees | Shows both the bowl and the surface of the food |
| Plated mains with height and sauce | 30 to 45 degrees | Mimics the diner's view while keeping depth |
| Drinks in glasses | Straight on or slightly above | Shows color, layers, garnish and the glass shape |
Style the dish without changing it
Food styling for a menu is about presenting the real dish at its best, not building a fantasy. Use the same plate, portion and garnish that guests receive. The difference is care: wipe the rim, place the garnish precisely, make sure the sauce has not split and that the food is photographed within a minute or two of leaving the pass.
Have the kitchen plate a dedicated photo portion and bring it out immediately. Hot food loses its gloss and steam quickly, greens wilt and fried food softens. A light brush of oil restores shine to grilled vegetables or meat, a spritz of water freshens salad leaves, and herbs added at the last moment stay bright. These are honest tricks because the guest's plate would look the same if it went straight from the pass.
Surfaces and props
Choose two or three surfaces that suit your restaurant, such as a worn wooden board, a stone slab, a linen cloth or a matte table top, and use them across the whole menu. Matte surfaces photograph better than glossy ones, which reflect light and phone screens.
Keep props minimal and relevant. A spoon in a dal, a folded napkin, a small bowl of raita beside a biryani or a wedge of lime beside a taco adds context. Avoid props that suggest something the guest will not receive, like a side sauce that is not served or extra garnish piled around the plate.
Composition basics
Leave some space around the dish so it can be cropped to different shapes later. Place the hero element, such as the protein or the decorated center, slightly off center using the phone's gridlines. Fill most of the frame with food; menu photos are viewed small, so a plate lost in a sea of table looks tiny on a phone screen.
- Paper towels and cotton swabs for cleaning plate rims
- A small paintbrush and neutral oil for restoring shine
- A spray bottle of water for leafy greens and fruit
- Tweezers and a small offset spatula for placing garnish
- White and black foam boards for bouncing or blocking light
- Baking paper or a thin white cloth to diffuse direct sun
Shoot good photos with a smartphone
Modern smartphones produce images more than good enough for menus, especially on a digital menu where photos are displayed at phone size. The weaknesses of phone photography are mostly about technique: dirty lenses, wide-angle distortion, automatic exposure that changes from shot to shot, and harsh flash. All of these are easy to fix. You do not need extra apps or accessories to start.
Use the main camera, usually marked 1x, or the 2x or telephoto lens if your phone has one. The ultra-wide lens distorts plates into ovals and makes the nearest food look oversized. If you need to get closer, move the phone rather than using digital zoom, which throws away detail. A small tripod or a stack of books keeps framing identical across a series of dishes.
- Wipe the lens with a soft cloth; a fingerprint smudge causes hazy, low-contrast photos.
- Turn off the flash and overhead lights and work beside a window.
- Switch on gridlines and choose the main or 2x lens rather than ultra-wide.
- Tap to focus on the most important part of the dish, then lock focus and exposure.
- Slide exposure down slightly so highlights such as white plates and sauces are not blown out.
- Take several frames with small changes in angle and garnish placement.
- Shoot in RAW or the highest quality setting if your phone supports it, then review at full size before the dish goes back.
Make the whole menu look consistent
Guests judge the menu as a whole. A beautifully lit hero dish next to a dark, yellow-tinted snapshot makes both look worse. Consistency comes from repeating the same conditions: the same spot by the window, the same time of day, the same surfaces, the same angle for each dish type and the same editing settings. Small differences add up quickly when photos sit side by side in a grid.
Write a short house style for photos. It might say that all mains are shot at 45 degrees on the dark wooden board with side light from the left, drinks straight on against the cream wall, and every image is cropped square. Store it with the shot list so anyone on the team can reshoot a dish later and match the rest.
Plan for reshoots. Dishes change, plates break and garnishes evolve. If your style is written down and your setup is simple, replacing one photo takes minutes rather than a full session, and the menu stays coherent for years. Keep the surfaces, boards and reflectors you used in one labeled box in the office, along with a printed copy of the style notes, so the setup can be rebuilt quickly by anyone on the team.
Edit lightly and keep colors true
Editing should correct the photo, not reinvent the dish. Start with white balance so whites look white and not blue or orange; this matters for food because guests read color as freshness. Then adjust exposure and contrast, straighten the horizon, and crop to your chosen aspect ratio. Most phone editors and free apps handle all of this. Work on a calibrated or at least bright screen.
Resist heavy saturation and filters. Over-saturated greens look artificial, and warm filters make curries and fried food look greasy or stale. Light sharpening helps at small sizes, but too much creates halos. Save your adjustments as a preset and apply it to every photo in the series so the menu stays consistent. Check the edited photos on a phone too, since that is where guests will see them.
Never add elements that are not on the plate, remove ingredients guests will receive, or change the apparent portion size. Removing a crumb or a smear on the plate rim is fine; making a portion look larger is not. Guests compare what arrives with what they saw, and the photo should survive that comparison every time. If a photo needs heavy correction to look good, it is usually faster and more honest to reshoot the dish in better light.
Honesty: the photo must match the dish
A menu photo is a promise, and the plate that arrives should keep it. When the plate that arrives looks different from the picture, with a smaller portion, a missing garnish or a different presentation, guests feel misled even if the food tastes good. That disappointment shows up in reviews and in how often guests return. It is entirely avoidable with a little discipline.
Photograph the real dish, plated by the kitchen to the standard recipe, and reshoot whenever the recipe or presentation changes. If you change suppliers, swap a garnish for the season or move to a new plate, the photo needs to change too. In some regions, advertising and consumer protection rules also apply to menu images, so check local guidance if you use photos to advertise.
Train the kitchen to plate to the photo. Print or display the current photo at the pass beside the plating spec so cooks have a visual reference during service. This keeps the dish consistent from cook to cook and makes the photo honest by design. When a cook spots a difference between the photo and the plate, that is a signal to either correct the plating or schedule a reshoot, and it should be raised at the next line-up.
A menu photo is a promise, and the plate that arrives should keep it.
Prepare photos for a digital menu
Digital menus are often opened on mobile data at the table, so large image files make the menu slow to load. A photo straight from a modern phone can be several megabytes and thousands of pixels wide, far more than a phone screen can show. Resize before you upload: a long edge of around 1200 to 1600 pixels is plenty for menu display, and compression can bring most dish photos down to a few hundred kilobytes without visible loss.
Use a consistent aspect ratio, such as square or 4:3, so photos line up neatly in the menu layout. JPEG and WebP are good formats for photographs; avoid PNG for photos because the files are much larger. Name files clearly, such as paneer-tikka-main.jpg, and keep the full-resolution originals in a shared folder for future print or marketing use. Back that folder up regularly.
In Menulo, for example, owners and managers can add a photo to each dish in the menu editor, and the photo appears with the dish on the public menu that opens from your QR code. When a dish changes, replace the photo in the same place so guests always see the current plate. Check the result on a phone after every change, as a guest would see it.
- Resize to a long edge of about 1200 to 1600 pixels for on-screen menus
- Export as JPEG or WebP at a quality that looks clean on a phone, typically a few hundred kilobytes
- Crop every image to the same aspect ratio before uploading
- Check each photo on an actual phone, on mobile data, after it is live
- Keep full-resolution originals for print and marketing
Frequently asked questions
Can I take professional-looking menu photos with a phone?
Yes. Recent smartphones are more than capable for menu photos, especially for digital menus viewed on phones. The results depend on technique: soft window light, the main lens instead of ultra-wide, locked focus and exposure, a clean lens, consistent angles and light editing. A professional photographer is worth considering for print or advertising.
What is the best angle for food photography?
It depends on the dish. Shoot flat dishes like pizza, thalis and sharing boards from directly above. Shoot tall or layered dishes like burgers and cakes at eye level. Bowls such as curries, soups and ramen usually look best at around 45 degrees. Keep the same angle for each dish type across the menu.
What light is best for photographing food?
Soft, indirect daylight from a single window is the most reliable. Place the dish to the side of or slightly in front of the window so light comes from the side or behind, turn off overhead lights to avoid mixed colors, and use white card to soften shadows. Avoid on-camera flash, which flattens food and creates harsh reflections.
What size should photos be for a digital menu?
For on-screen menus, a long edge of roughly 1200 to 1600 pixels is usually enough, compressed as JPEG or WebP to a few hundred kilobytes. That keeps the menu fast on mobile data while still looking sharp on phone screens. Keep the full-resolution originals separately for printing and marketing.
Is it acceptable to style food differently for photos?
Styling should present the real dish at its best, not change it. Use the same plate, portion and garnish guests receive, clean the rim, and refresh shine or herbs just before shooting. Do not enlarge portions, add ingredients that are not served or use inedible props that misrepresent the dish.
- #foodphotography
- #menuphotos
- #smartphonephotography
- #foodstyling
- #digitalmenus